Palletisation is key to the smooth delivery of goods and ultimately the success of a business, so it’s surprising how often it goes unnoticed – until things go wrong.
Pallets, especially wooden ones, are ubiquitous in the supply chain, and used by a wide range of industries. In the UK alone, around 50 million new timber pallets are made each year. Their popularity is down to the fact they allow for the secure and cost-effective shipping of large quantities of product. However, it’s the way the pallets are packed that really decides how safe and efficient they are when it comes to handling, storing, and transporting your goods.
In this blog, we share Actionpoint’s approach to perfect palletisation, including best practice and top tips.
Pick your pallet
Before you can get palletising, first you need to get your pallets. The size and type to choose depends on factors such as how and where the pallet is going to be used, the type of goods that it will hold, business requirements such as storage capacity, and customs regulations. The main pallet sizes are UK Standard, which is 1200mm x 1000mm, and the smaller Euro pallet at 1200mm x 800mm, although bespoke sizing is available, too. If a product is at risk of overhang, for example, you may want to specify a larger pallet, such as 1400mm x 1200mm. Pallet choice also depends on your storage method. If a business has Euro racking in their warehouse – which is a good way to optimise space – they will need to use Euro pallets.
The most widely used pallets are made of wood or plastic, although there are paper and metal options as well. The traditional wooden pallet is a good all-rounder, suitable for most circumstances, can be used multiple times, can be repaired, is easy to recycle, and specially treated versions are available. Food and pharmaceuticals manufacturers using wooden pallets, for instance, have to use heat treated and/or chemically treated ones. These protect their products from the risk of pests and pathogens being present in the wood. For the same reason, some countries, such as Australia, don’t allow imports on wooden pallets and will only accept plastic. Although not as popular as wooden pallets (probably due to the higher cost), plastic pallets are easy to wash, can be reused many times, and are useful for heavier loads.
Compared to wood and plastic, paper and metal pallets are more niche. Paper pallets are more suited to lighter loads and are susceptible to damage from damp conditions and adverse weather. Metal pallets carry heavy duty loads, tolerate extreme temperatures, and can be found in industries such as automotive, aerospace, and UK defence.
So, what happens once you have your pallet at the ready? Read on, for a step-by-step guide to palletising like a pro.
- Check your pallet
Make sure your pallet is sturdy, undamaged, and ready for the load to be stacked onto it. This is a visual check to see if there’s anything wrong, such as breaks, cracks, or missing slats or blocks. If there is a superficial imperfection and you’re using a light load there may be a low risk of danger. But if you’re transporting heavy products and the pallet has a crack or a missing slat then it’s not safe. Sometimes a lightly damaged pallet can be repaired, but best practice is to replace it with an intact pallet. When it comes to costly breakages or accidents, prevention is better than cure.
- Pad your pallet
Pallets are reused many times and they do become dirty, so it’s a good idea to use a layer pad to prevent boxes from directly touching the pallet. The layer pad, which is a square of corrugated cardboard, is placed on the pallet before loading the goods. It also creates a smooth and level surface for better stability when packing the pallet, and provides additional cushioning and shock absorption. Flat and very light, layer pads are easy to store and barely add any weight to your pallet.
- Stack your pallet
Products should be stacked uniformly, with the weight distributed evenly across the pallet. So, if there are eight boxes, then you would place four on one layer and four on the next, rather than six on the bottom and two on top. If a pallet is weightier on one side, it loses stability and box strength is compromised, increasing the odds of falling boxes, breakages, delays, and injuries. Position the boxes so that corners are on top of corners as this maximises stacking strength. You can also choose to place a layer pad between each layer of boxes if further protection and stability is required.
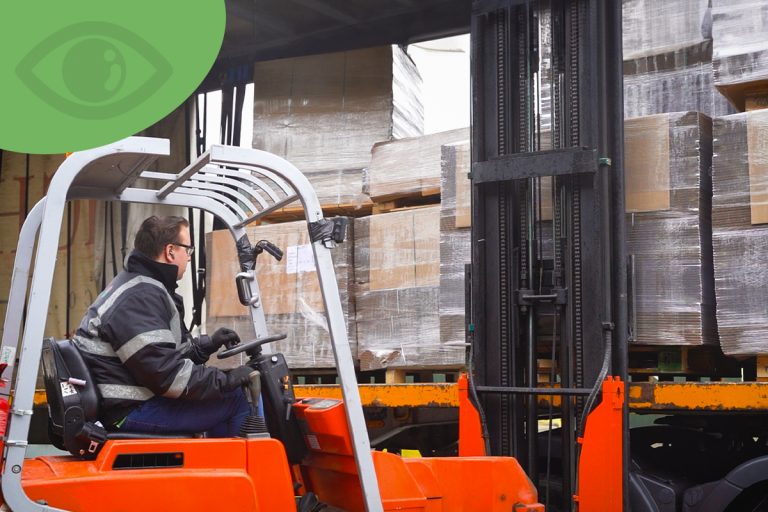
Goods can be stacked either within the parameters of the pallet or with overhang. This is essentially down to your preference, unless it’s a product that would overhang no matter what you do. But overhang does mean a higher probability of something touching the boxes, leaving a superficial mark or more significant damage. Human error can come into play and the forks of a forklift truck are unforgiving if they contact the goods instead of the pallet.
When a pallet is configured to its most efficient state – stacked, strapped, and wrapped – the resulting length, width, and height are known as the loaded pallet dimensions. Now, any of these measurements can be adapted according to your needs. For example, quantities and pallet types can be changed to better suit your racking systems, making storage easier and more efficient.
A top tip is to make the most of your packaging supplier. They should be able to advise you on which combination of box material and stacking method to use for optimum pallet efficiency and product protection. A good supplier will also note any empty space within the boxes or unsuitable voidfill, as these create an area of weakness in your packaging. They will likely suggest a better box design to eliminate the gap, a more appropriate voidfill, or a different stacking approach.
- Contents check
Once all the boxes are stacked, check the pallet for stability. At this point, you’re making sure the goods are packed tightly together to prevent any movement during transportation. Don’t leave any spaces, the boxes should be right up against each other and evenly arranged.
- Top layer pad
Place a layer pad over the top of the loaded pallet and use a minimum of two straps to secure the goods to the pallet. This double walled corrugated cardboard pad will help to keep the boxes in position and shield them from overzealous strapping. Getting the tension of the straps just right is a balancing act. If the tension is too high, the strapping can cut through, dent, or scrape the boxes. If it’s too loose, the boxes can move around on the pallet. The more movement there is, the greater the risk of broken goods and accidents.
You can also choose to add edge guards to each corner. The industry standard is to use strapping only, but you may wish to apply edge guards for additional protection, such as if damage rates in transit are unacceptably high. When delivery is going to be by courier, as opposed to doing it yourself, we recommend using as much protection as possible.
- QC pallet check
At this stage, the pallet should be quality checked. You’re looking for damages from stacking and strapping and to see if anything has noticeably moved on the pallet. This is a visual check, looking all round for any defects before applying the stretch wrap. If any corrections are needed, they can be made at this point – it’s impossible to make adjustments after the stretch wrap is in place.
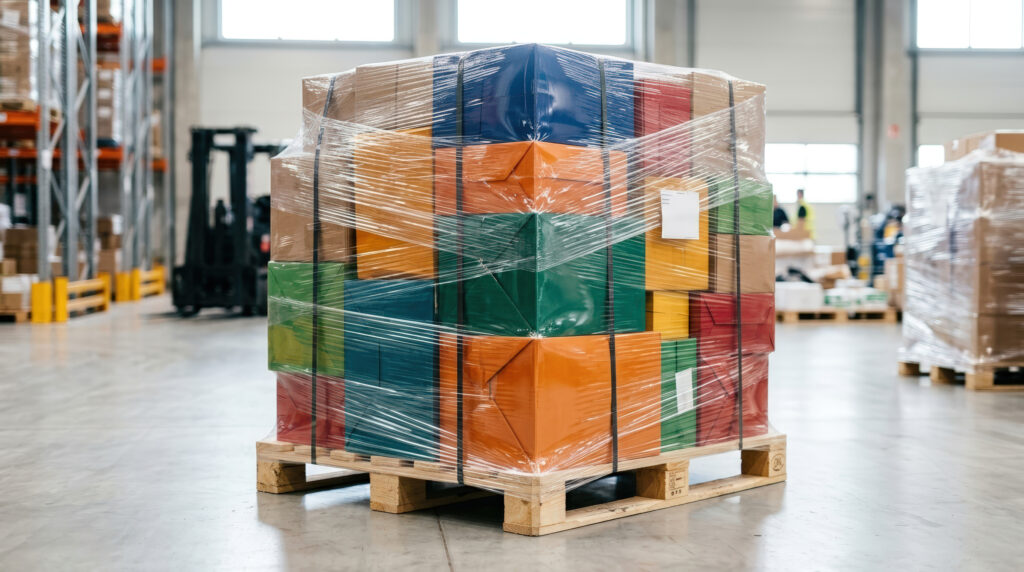
- Wrap your pallet
The pallet is then wrapped in stretch wrap to secure the load for transport. As with the strapping, the tension of the film should be considered. Too tight, and the boxes are compressed, reducing their ability to protect the goods. Too loose, and you could end up with boxes all over the place before you’ve even reached the loading bay.
There are two methods of wrapping: by hand or using an automated wrapper. The most efficient way to do it is by machine in terms of product use, wastage, cost, and time. A machine uses the optimum amount of material and has a set number of spins to complete while wrapping. When hand wrapping, the operator is judging the situation by eye, and trying to keep the tension consistent for the 30 or so times they have to walk around the pallet. There are simply too many variables for manual wrapping to be done as consistently and effectively as an automated solution.
- Final check
Most operations will now send the pallet on its way. But at Actionpoint, we perform a five-point check to confirm there are still no issues with the pallet before it’s despatched. We double check the pallet itself, the goods, the strapping, the stretch wrap, and the general overall appearance of the finished pallet. This final check can be performed straight after wrapping, or once it has been moved to the loading location, to ensure everything is intact and in position.
Common problems
We’ve helped countless businesses over the decades with their packaging and palletising, and there are two main problems that crop up time and again. The first is when the load of the pallet has not been spread evenly across its footprint. This makes it unstable and reduces the performance of the protective packaging. The second issue is when operators are not using the ideal method to secure the load – meaning the type, amount, and tension of the strapping and/or stretch wrap. More often than not, users are applying way too much or too little.
Both problems can be solved with help from your packaging supplier. At Actionpoint, we offer a bespoke palletisation service that is ideal whether you’re launching a new product or would like to improve your current palletising system. Using specialist software, we calculate the most economical way to palletise your boxes, and provide you with detailed diagrams explaining the materials required and how to implement the solution – we can even visit your premises if you like, to give your warehouse team a demonstration in person.
The right tools for the job
There’s no need to waste time, costs, and effort shopping around when you can get a complete palletisation solution from Actionpoint. We supply pallets, layer pads, anti-slip mats, top sheets, edge guards, strapping, and stretch film. Plus, all the kit you need including strapping seals, tensioners, and pallet wrap dispensers.
You’re not left in the dark either, as we can help you select the right tools for the job and the best way to use them. Take advantage of our years of experience on how to:
- Create loads that are easier to handle, store, and deliver.
- Increase safety in handling and transporting goods.
- Optimise warehouse space and stock efficiencies.
- Prevent damage to goods, ensuring they reach their destination in pristine condition.
Whether you need general palletisation advice, or you have a specific problem you’d like to address, you’ll always find support available from our team. Not sure if your wrapping method is cost-effective? It’s entirely possible, some businesses routinely use up to four times as much as they need to! Contact us today, so that we can help you identify what improvements can be made and create the ideal solution for your business.